To access Vetsource Payments, click the link associated with your account type.
If you were provided with a 6-digit account ID and password, choose Practice Home. If you were provided with an access code, choose Affiliate Practice.
Your account ID or access code was provided in your welcome email. For assistance recovering your practice ID or access code, contact Support.
Enter your PracticeID (account ID) or Practice Code (access code) and click Continue.
Enter your practice password.
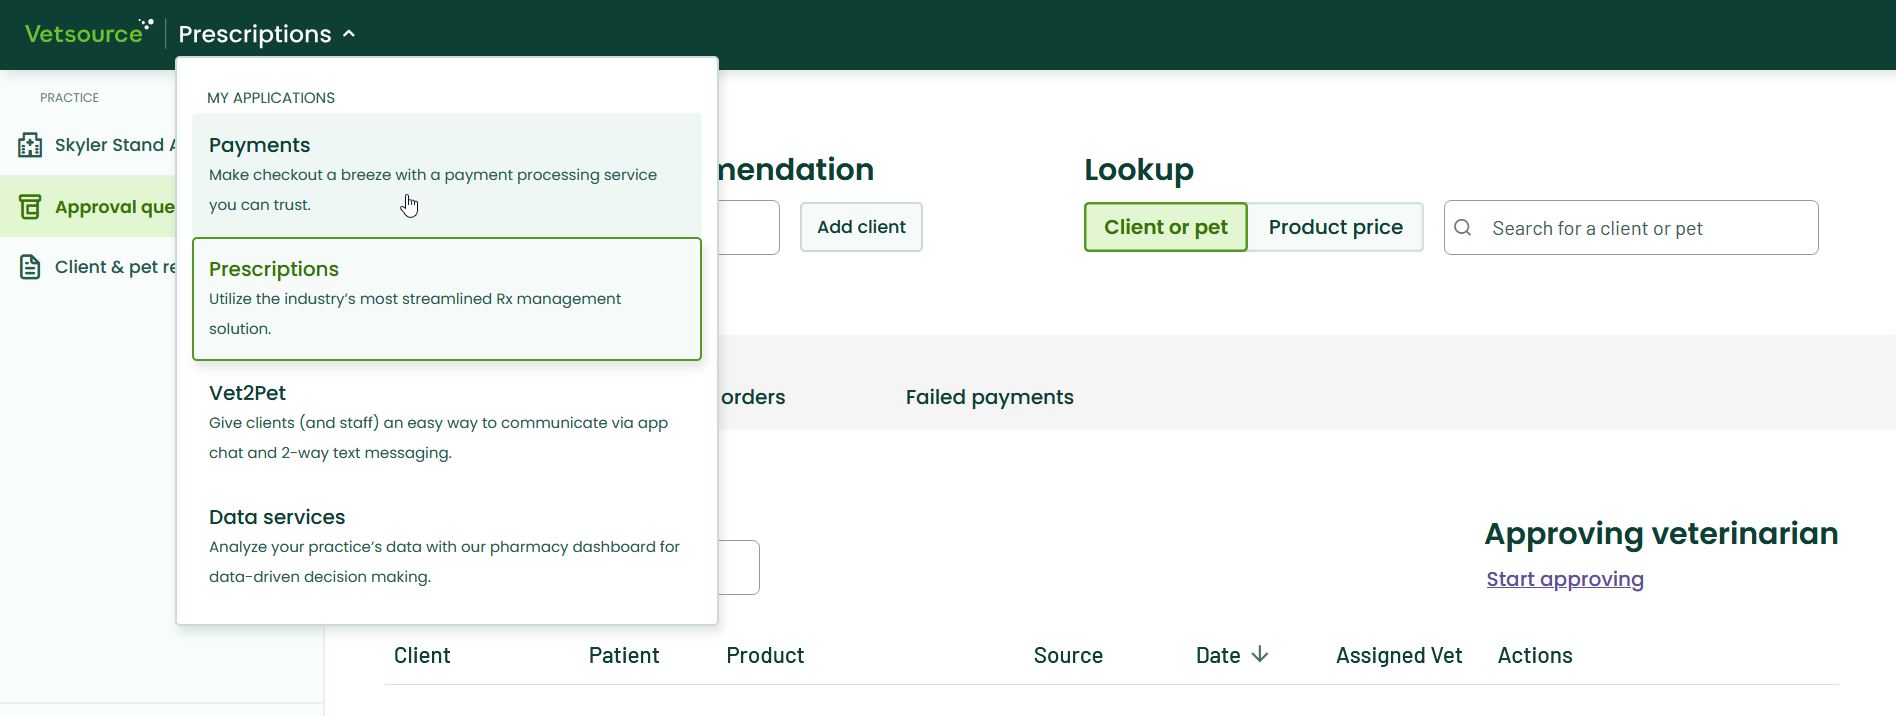
Click on Prescriptions to access the services drop down and click Payments.
Users will remain permanently logged in unless they choose to log out or the browser cookies have been cleared. Choosing the Change Practice link will require the user to re-enter the Practice ID.
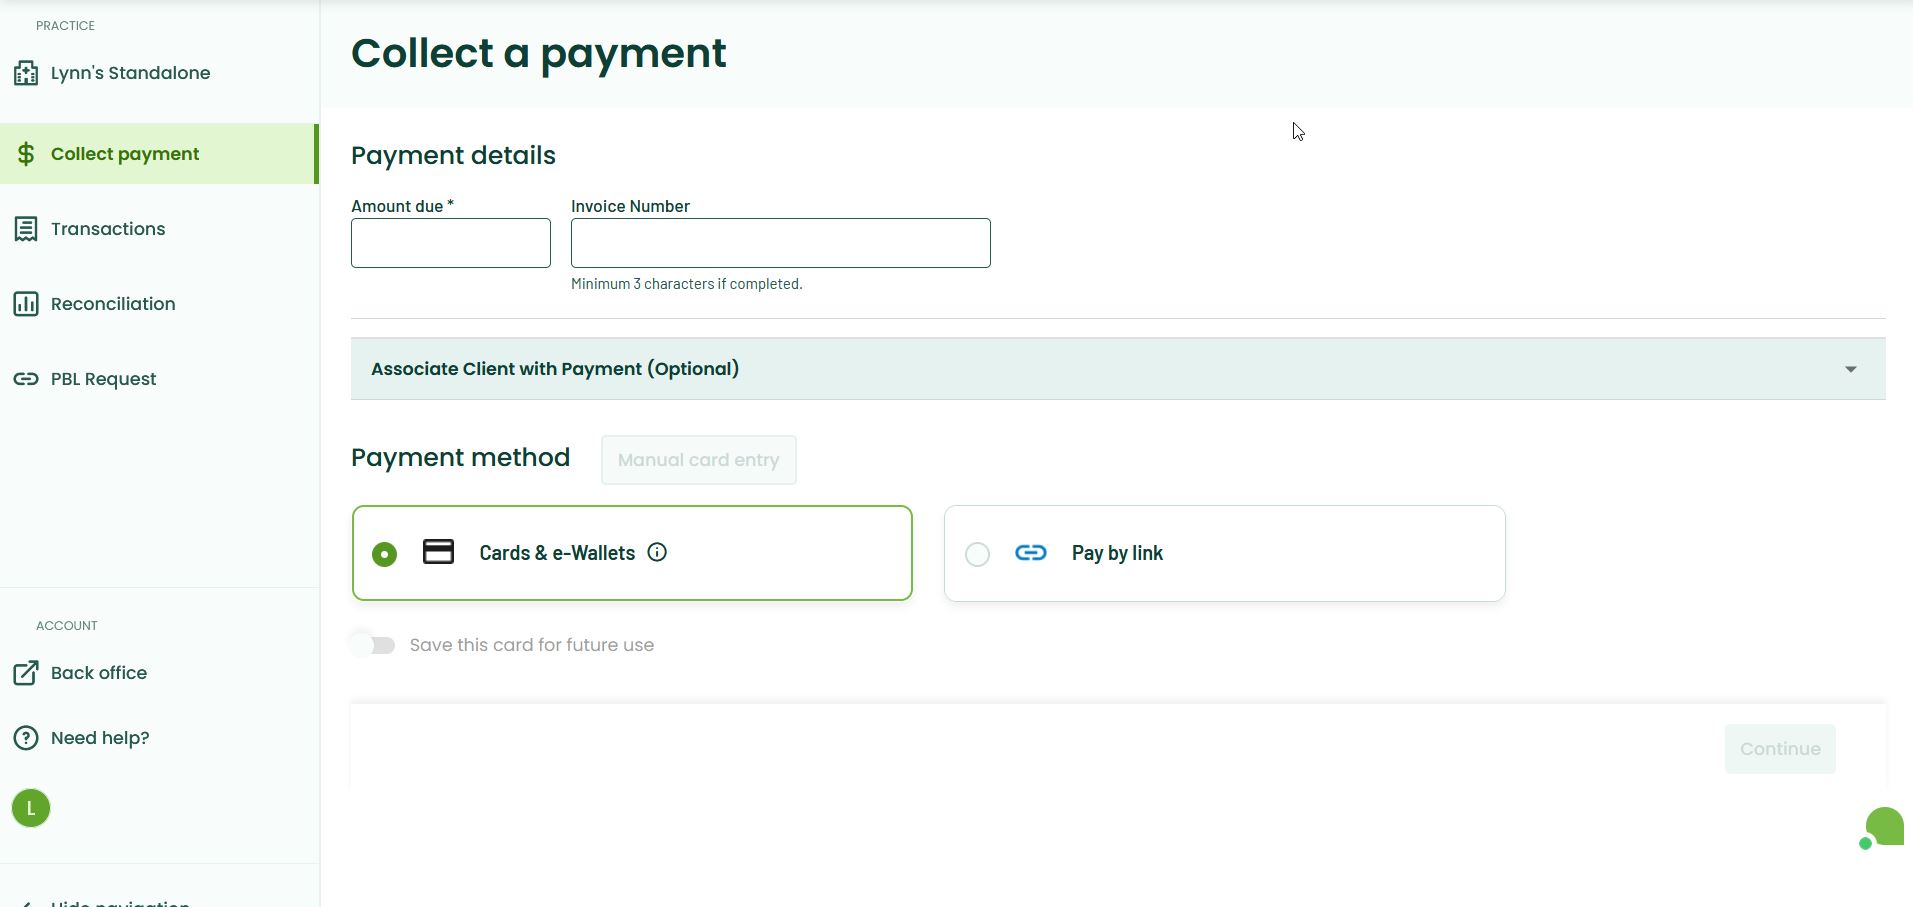
Collect payment
From the Collect payment tab, input the amount to be charged in the Amount due field. Add any alphanumeric value up to 50 characters in the Invoice Number field and choose a payment method. It is recommended to input a Client ID, invoice number or text reference in the Invoice Number field to be able to reference a payment to the client's account in your PIMS.
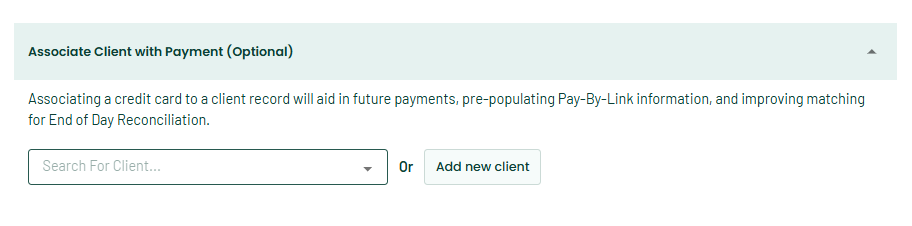
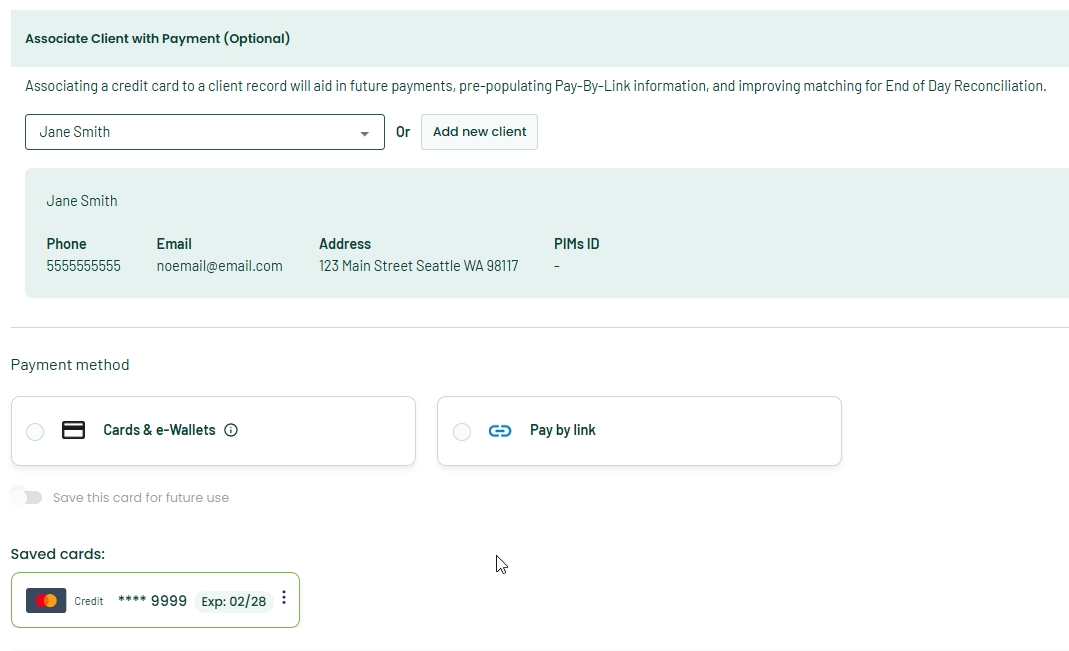
The Associate Client with Payment feature is optional. Benefits of using this feature include saving a card on file, auto populated client information in the pay by link pop-up and improved matching on the end of day reconciliation report. Just click the bar to add or search for a client.
You can add a new client by choosing the Add new client button. You can do this at the time of collecting a payment or before you plan to collect a payment. It's important to note that you cannot associate a client to a payment once a payment transaction is completed.When you add a new client, they will be searchable for future transactions. If your practice offers Home Delivery, clients who have placed orders will also be searchable on the payments platform.
Choose Cards & e-Wallets for card payments including mobile or "tap-to-pay" payments and manual card entry. The terminals support Apple Pay, Google Pay and Samsung Pay.
To manually input a card number into the terminal, select Manual card entry. The Cards & e-Wallets method must be selected to enable this option. If the client is NOT present, the terminal will require a CVV/CVC code to be entered.
Save and use a card on file
To save a card on file, The Associate Client with Payment feature is required. Search for or add a new client, choose Cards & e-Wallets, then toggle the "save this card for future use" feature. The card is encrypted when processed through the terminal. The card is then available for future use by searching for the client and selecting the desired card from the payment methods.The option to delete a card on file is available by clicking the 3 vertical dotted menu to the right of the saved card.
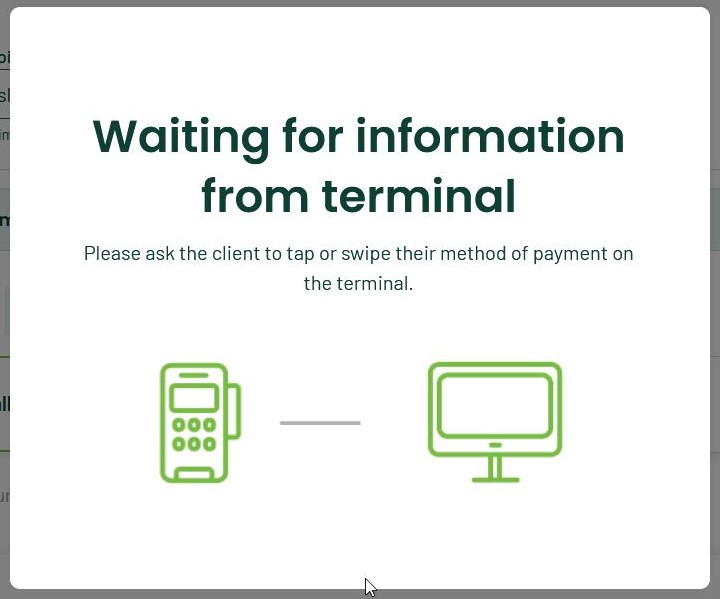
Click Continue to send the payment request to the terminal. The user will be prompted to wait for the client to present their payment to the terminal.
Pay by link
To send a Pay by link payment request, first select the Pay by link payment method from the Collect payments tab and click the purple Continue button.
Enter the client's first and last name and the email address OR phone number to send the link via text message in the pop-up and click Send Link.
If you use the Associate Client with Payment option when choosing the payment method, the Pay by link pop up will auto populate the client's email address.
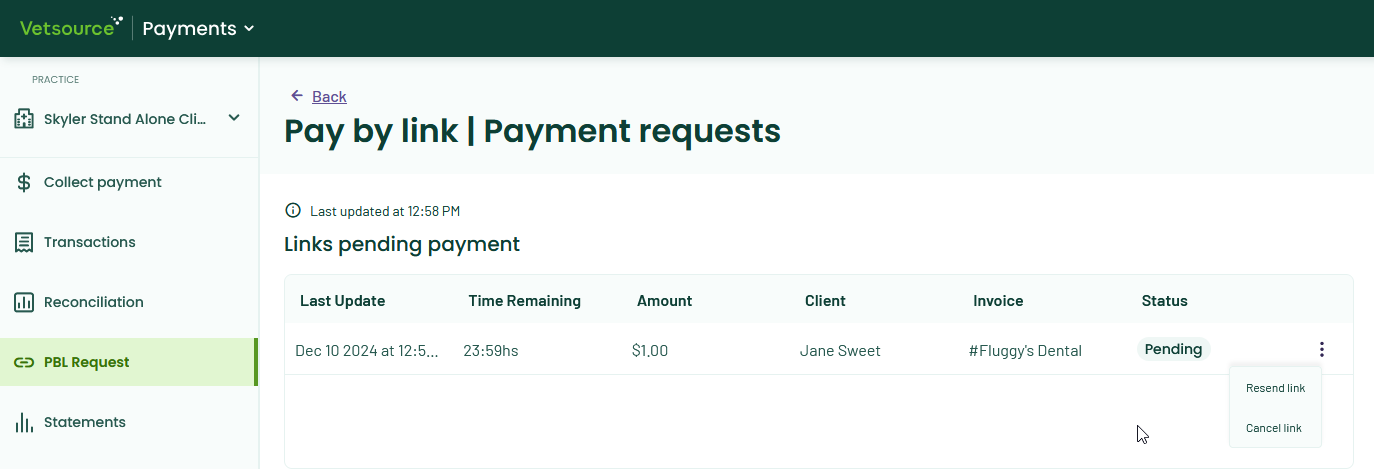
Pay by link payments can be managed from the PBL Request tab. Once a pay by link request has been sent, it will automatically appear in Pending status under Links pending payment. The 3 vertical dots to the right of the pending link provides the option to resend or cancel a link.
You can use the Resend link option at any time from both the pending links section and the expired links section. You can also change the method of delivery from text to email and vice versa. Please note that resending a link resets the expiration time.
Clients will have the allotted time set by your practice to pay via a link before it expires. The expiration time is set using the Settings link accessed by clicking the arrow to the right of your practice name. The expiration time can be set for any time between 1 and 69 days.
Once a pay by link has been paid, it will appear in the Transactions list and disappear from the pending links list. You will also receive an email that the link has been paid to the email address we have on file for you. If you need to update this email, please reach out to our support team.
Transactions
To view the Transactions list, select the Transactions tab on the left sidebar.
The most recent payment processed will be at the top of the Transactions list.
The Client name will be reflected in one of three ways: the name of the Cardholder of the card used to make payment, the client associated using the Associate Client with Payment feature or the client information entered in the Pay by Link form.
If the issuing bank does not release the Cardholder information, the client name will be blank therefore we recommend using the Invoice Number to reference payments to the appropriate client account in your PIMS. This field is alphanumeric and can accept up to 50 characters.
All transaction searches must begin with a filter by Date or Date Range. Once a date range is selected, you may further refine your search using additional filters such as Payment Method, Status, or Amount. For locating a specific transaction, you can also search by Client Name or values added in the Invoice Number field.
Select the purple Export button in the top right corner to download the list of transactions as a CSV file.
To download a Checkout Summary as a PDF, select the 3 vertical dots to the right of the transaction line and choose Download.
Refund a transaction
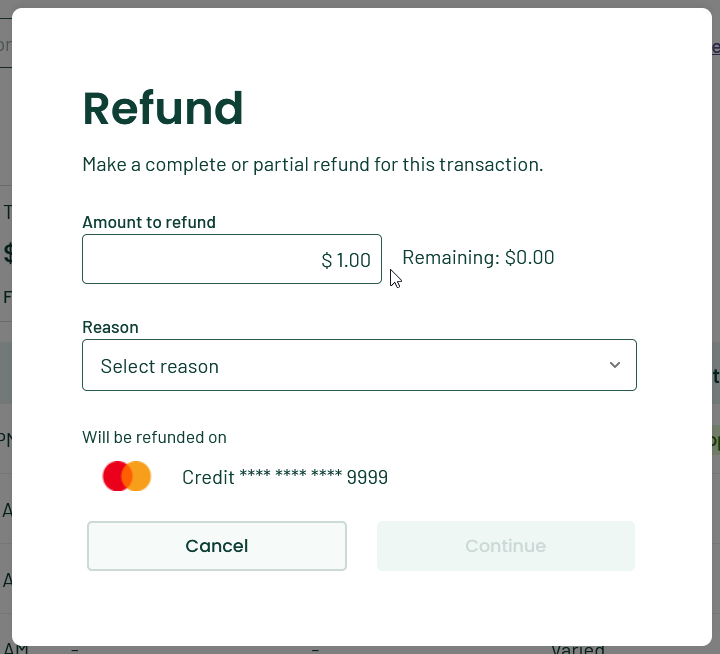
To process a refund, select the 3 vertical dots to the right of the transaction line and choose Refund.
Select a Reason from the dropdown list and click Continue.
To process a partial refund, adjust the amount in the Amount to refund field.
A pop-up will appear to confirm the Refund request details. Select Continue to process the refund request.
Once a transaction has been refunded, the Method will appear as Varied in the Transactions list. Select the arrow to the left of the transaction line to expand the payment operation.
Select the 3 vertical dots to the right of the Varied transaction line and select Download to retrieve a PDF copy of the payment and refunded transaction.
Refunds can only be applied to the original payment method. The funds will be returned to the client's account in 3-5 business days.
Reconciliation
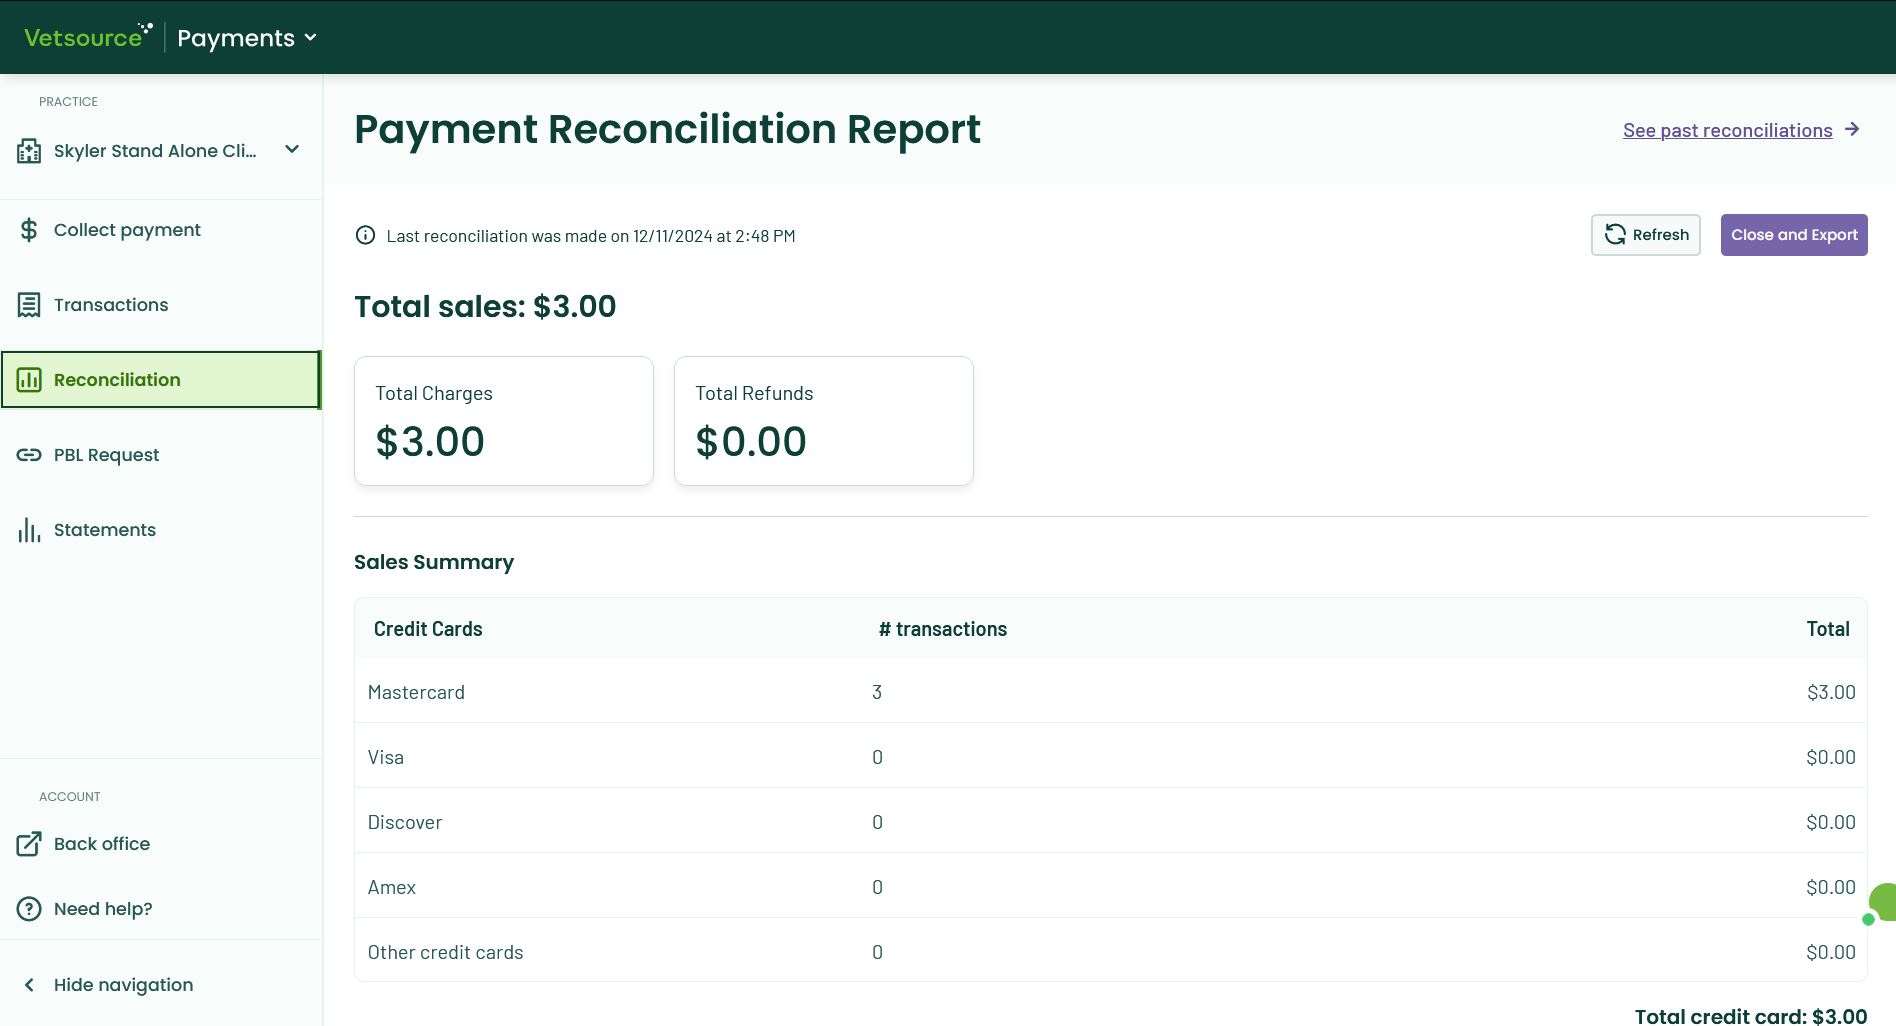
To review the practice totals and close the daily Payment Reconciliation Report, navigate to the Reconciliation tab.
This report provides a breakdown of the practice total sales, charges, and refunds processed since the last report was closed.
The Sales Summary provides a breakdown of the number of transactions and the total amount processed by each card brand.
All transactions included in this Payment Reconciliation Report will be listed in the Transactions in this period section.
To close a Payment Reconciliation Report, select the purple Close and Export button in the top right corner of the screen.
Confirm the Close and Export request. A PDF file of the report will be downloaded to your downloads folder where it can be printed.
Once a Payment Reconciliation Report has been closed, it cannot be reopened. A new Payment Reconciliation Report will begin with the first transaction processed after a report is closed.
Past reconciliation reports are available by clicking the See past reconciliations link in the top right corner of the screen.
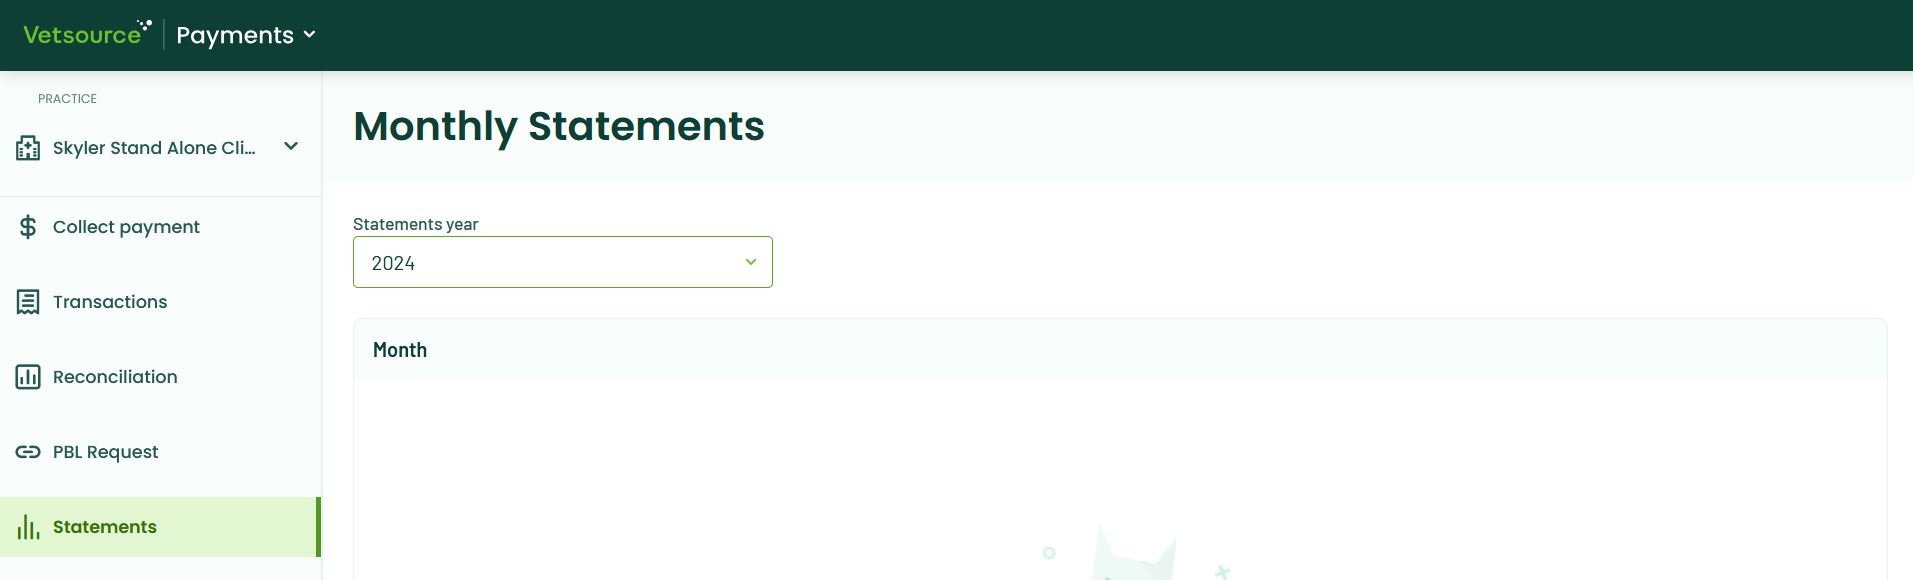
Statements
Monthly statements are generated on the 6th of the month for the prior month and are always available from the Statements tab.
Support
For questions or assistance, there are multiple ways to contact Support!
(833) 958-4247
vetsourcepayments@vetsource.com
Chat from the Payments platform
We are available Monday through Friday from 5am - 5pm PST.
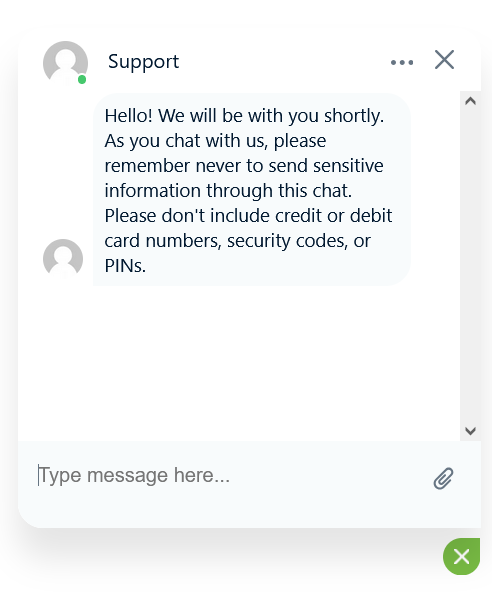
How to Chat!
Click on the green bubble in the lower right corner of the payments platform screen to open a chat window.
Select the X to minimize the chat window or select the 3 dots and choose "End chat" to close the chat session.
After ending a chat session, users have the option to enter an email address to send a transcript of the chat conversation.
Remember to never share sensitive information such as passwords or PIN numbers when using the chat feature.
 Updated